Animated Text Effect in PowerPoint

I used this presentation to make the video. This is the YouTube video where this presentation was used.
1. Choose a Picture
All pictures tell stories. All stories can be told with a picture! So choose one that suits your story and place it on your slide. You can make it any size that you want to.

2. Place a shape and text over the picture
Eventually, what we want to achieve is for the picture to peek out from behind the text; We want the picture to come flying toward the viewer through the text. Something like this...


Now select the shape first and then the text box and go to Shape Format, Merge Shapes, and Union this will leave a void in the shape where the letters of your message were. If you do the selection in a different order (i.e. first the text box then the rectangle shape) your new freeform shape will inherit the color of the letters.

3. Duplicate your slide
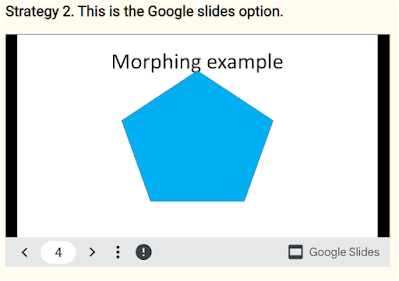
As soon as you have a cut-out over an image, make a duplicate of the slide and use a "Morph" transition effect on the second slide. Morph traditions work by incrementally changing one image on one slide into another image on the second slide. Making the shape larger in the second image
creates the impression of the shape growing over time into the image on the second slide. The default "growth time" is 2 seconds, but you can change it to cause the change to appear faster or slower.
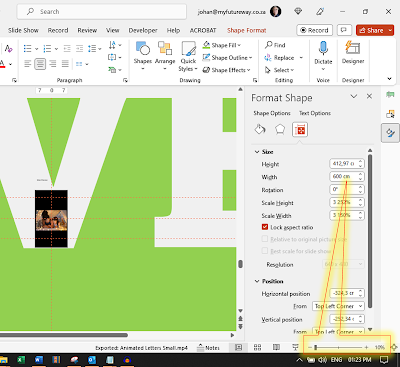
Of course, if you make the "cut-out" so big that the slide and picture below are smaller than the void in the "cut-out" it would create the illusion that the viewer is looking through the void. To achieve that you have to set the zoom as mall as possible. 10% is the smallest you can achieve. Moreover, you will have to set the size by manually adjusting the width and height properties in the Format Shape pane (You won't be able to drag it big enough.)

Please comment below and let us know how yours came out!
Udemy hosts a course on Interactive PowerPoint Animations that I created. So, please visit it. PowerPoint presentations used in the course can be used as templates for your own animations. Moreover, I sometimes have discount coupons for the course to give away. I post the coupons on my Facebook page, but they go quickly, so I offer them to my mailing list first. Please send me an e-mail johan@myfutureway.co.za

Comments
Post a Comment
Please include your e-mail for further information.